Howard Miller clocks are renowned for their exquisite craftsmanship and timeless designs; This manual provides essential guidance for setup, maintenance, and troubleshooting to ensure optimal performance and longevity.
1.1 Overview of Howard Miller Clocks
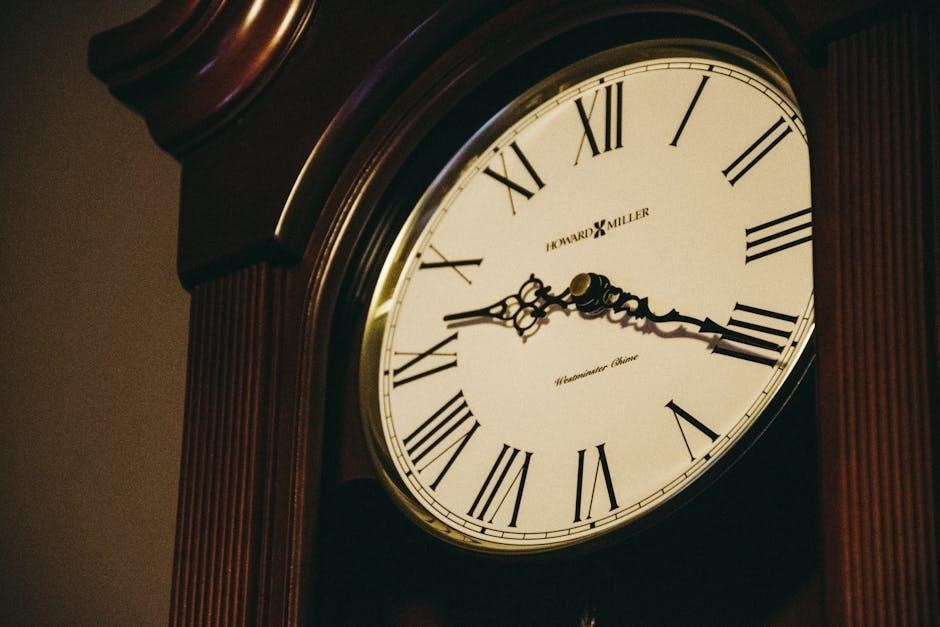
Howard Miller clocks are celebrated for their elegant designs, precise engineering, and rich heritage. Offering a wide range of styles, from grandfather clocks to wall and mantel clocks, these timepieces blend traditional craftsmanship with modern functionality. Many models feature intricate chime functions, pendulum movements, and timeless aesthetics that enhance home decor. This manual provides comprehensive guidance for setting up, operating, and maintaining your Howard Miller clock, ensuring years of reliable service and enjoyment.
1.2 Importance of the Instruction Manual
The instruction manual is crucial for ensuring proper setup, operation, and maintenance of your Howard Miller clock. It provides detailed guidance for assembling, configuring, and troubleshooting, helping you avoid common issues. By following the manual, you can optimize performance, preserve the clock’s longevity, and understand its unique features, such as chime functions and pendulum adjustments. This resource serves as a comprehensive guide, addressing specific models and their requirements, ensuring your clock operates flawlessly and retains its value over time.

Unpacking and Initial Setup
Unpack your Howard Miller clock carefully, ensuring all components are included. Position it in a stable, level area to prevent tipping and ensure proper operation.
2.1 Safely Unpacking the Clock
When unpacking your Howard Miller clock, carefully remove all packaging materials to avoid scratching the finish. Inspect the clock and components for damage. Gently lift the clock, ensuring the pendulum and weights are secure. Handle the chime tubes and other fragile parts with care to prevent breakage. Place the clock on a soft surface to protect it during unpacking. Verify that all accessories, such as keys and instructions, are included. Organize the components neatly to ensure a smooth setup process.
2.2 Positioning the Clock in the Room
Position your Howard Miller clock in a stable, level area away from direct sunlight and heat sources, as these can affect time accuracy. Ensure the clock is placed on a firm, flat surface to prevent tipping. Avoid areas with high humidity or drafts. For grandfather clocks, choose a location with enough space for the pendulum to swing freely. Use the provided levelers to ensure proper alignment. Plug in the clock or insert batteries, depending on the model, and verify that all components are securely in place before operating.
2.3 Ensuring Stability and Leveling
Place the Howard Miller clock on a stable, level surface away from direct sunlight and heat sources to maintain accuracy. Ensure the clock is positioned in an area with low humidity and minimal drafts. For grandfather clocks, allow sufficient space for the pendulum to swing freely. Use the provided levelers to adjust the base and ensure proper alignment. Check that the clock is not near heating vents or bathrooms to prevent moisture exposure. Ensure the clock is at least a few inches away from the wall for pendulum clearance and consider the power source location if applicable. Test the chime sound in the chosen spot and ensure the clock is not a tripping hazard. Adjust the levelers carefully and verify stability before operation.

Understanding Clock Components
Understanding the clock components is key for proper setup and maintenance. Key parts include the pendulum, weights, chime tubes, and movement, each essential for accurate timekeeping and chime functionality.
3.1 Identifying Key Parts of the Clock
Identifying the key parts of your Howard Miller clock is essential for proper setup and maintenance. The clock features a pendulum, which regulates timekeeping, and weights that power mechanical movements. Chime tubes produce the melodious sounds, while the clock movement is the core mechanism driving all functions. Understanding these components helps in troubleshooting and ensures smooth operation. Familiarizing yourself with these parts will make maintaining and enjoying your clock much easier over time.
3.2 Pendulum and Weight Components
The pendulum and weights are vital components of your Howard Miller clock, ensuring precise timekeeping. The pendulum swings rhythmically, regulating the clock’s movement, while weights provide the necessary power for mechanical operation. These parts are carefully designed to work in harmony, maintaining accuracy and reliability. Proper installation and alignment of these components are crucial for optimal performance. Understanding their roles and functions will help you appreciate the craftsmanship behind your Howard Miller clock and ensure its smooth operation over the years.
3.3 Chime and Strike Mechanisms
The chime and strike mechanisms in Howard Miller clocks produce rich, resonant sounds that enhance the clock’s ambiance. These mechanisms are intricately designed to deliver precise tones at specific intervals. The chime rods and hammers work in harmony to create melodious sounds, while the strike mechanism ensures clear, audible hour marks. Proper adjustment and maintenance of these components are essential to preserve their clarity and functionality, allowing you to enjoy the clock’s musical features for years to come.

Assembly and Installation
Assembly involves attaching the pendulum and weights, hanging chime tubes, and securing the clock movement. Ensure stability and proper alignment for smooth operation and functionality.
4.1 Attaching the Pendulum and Weights
Attach the pendulum and weights carefully to ensure proper clock operation. Remove the pendulum from its packaging and locate the hook on the movement. Gently hang the pendulum, ensuring it swings freely. For weights, lift them from their packaging and hang them on the corresponding chains. Make sure they are securely attached and balanced. Improper attachment can affect time accuracy or cause damage. Always refer to the user manual for specific instructions tailored to your clock model. Proper installation ensures smooth operation and longevity of the timepiece.
4.2 Hanging the Chime Tubes
Hang the chime tubes securely to ensure proper sound quality. Remove the tubes from their packaging and locate the designated hooks on the clock. Attach each tube carefully, ensuring they are straight and evenly spaced. Avoid touching the tubes excessively to prevent oil residue. If unsure, consult the manual for specific guidance. Proper installation ensures clear, resonant chimes. Misaligned or loose tubes may result in poor sound quality or mechanical issues. Follow the manufacturer’s instructions for optimal results and to maintain the clock’s warranty.
4.3 Securing the Clock Movement
Mount the clock movement securely using the provided brackets to ensure stability. Align the movement properly and tighten the screws gently but firmly. Avoid touching internal components to prevent damage. Ensure the movement is level and evenly balanced for accurate timekeeping. Use the provided hardware and follow the manual’s instructions for correct installation. Proper securing prevents mechanical issues and ensures smooth operation. Consult the manual for specific torque recommendations to avoid over-tightening, which could damage the mechanism. Secure installation is crucial for optimal performance and longevity of your Howard Miller clock.

Setting Up the Clock Movement
Set up your Howard Miller clock movement by following the manual’s instructions for quartz or mechanical models. Synchronize the pendulum for mechanical clocks and ensure accurate timekeeping. Adjust settings carefully to maintain proper function and stability. Level the clock and secure the movement to prevent imbalance. Refer to the manual for specific guidance on adjusting and fine-tuning your clock movement for optimal performance.
5.1 Quartz Movement Setup
Setting up the quartz movement involves inserting batteries and setting the time and date. Ensure the clock is level and stable. Insert the recommended batteries, avoiding mixed or old ones. Set the time accurately, synchronizing with a reliable source. Adjust the date, considering AM/PM settings. Place the clock away from direct sunlight to prevent overheating. Secure the movement according to the manual to ensure smooth operation. Test the pendulum for mechanical models, if applicable, to maintain accuracy. Follow these steps to ensure your Howard Miller clock runs reliably and keeps precise time. Always refer to the manual for specific quartz movement instructions.
5.2 Mechanical Movement Setup
For mechanical movement setup, begin by carefully attaching the pendulum and weights as instructed. Ensure the clock is level and stable to prevent uneven operation. Hang the chime tubes securely and lock the movement in place. Wind the weights according to the manual, ensuring they are evenly distributed. Allow the clock to settle for 24 hours before adjusting the time. Gently regulate the pendulum swing to achieve accurate timekeeping. Regularly inspect the escapement and lubricate as needed to maintain smooth operation. Follow these steps to ensure your mechanical movement runs precisely and reliably over time.
5.3 Synchronizing the Pendulum
Synchronizing the pendulum ensures accurate timekeeping. Stop the pendulum, set the correct time, and let it swing naturally. Adjust the pendulum’s beat by gently moving the rating nut up or down. Listen for an even tick-tock rhythm. Allow the clock to run for 24 hours before fine-tuning. Regular synchronization maintains precision and prevents time drift. Ensure the clock remains level during this process to avoid disrupting the pendulum’s balance. Proper synchronization is key to optimal performance and longevity of your Howard Miller mechanical clock.
Operating the Clock
Operating your Howard Miller clock involves setting the time, adjusting the pendulum swing, and regulating accuracy. Follow manual instructions for smooth functionality and precise timekeeping.
6.1 Setting the Time and Date
Setting the time and date on your Howard Miller clock is a straightforward process. For quartz models, simply move the hour and minute hands to the correct time and adjust the date dial. For mechanical clocks, wind the movement first, then set the time using the dial or key provided. Ensure the pendulum swings evenly for accurate timekeeping. Always refer to the manual for specific instructions tailored to your clock model to avoid errors and maintain precise functionality.
6.2 Adjusting the Pendulum Swing
Adjusting the pendulum swing ensures accurate timekeeping. Gently move the pendulum bob up or down to regulate the swing. Start the pendulum by releasing it, allowing it to swing naturally. Monitor its rhythm and adjust as needed to achieve a consistent swing. Proper adjustment ensures smooth operation and precise time accuracy. Always handle the pendulum with care to avoid misalignment or damage, ensuring your Howard Miller clock operates flawlessly.
6.3 Regulating Time Accuracy
Regulating time accuracy is crucial for optimal clock performance. To adjust, gently move the pendulum bob up or down to fine-tune the swing. Observe the clock over several days to ensure it keeps accurate time. If it gains or loses time, make slight and careful adjustments to the pendulum’s position. Handle the pendulum with care to avoid misalignment. Regular checks will help maintain precise timekeeping and extend the clock’s lifespan. Proper regulation ensures smooth operation and enhances the clock’s reliability over years of use.

Chime and Strike Functions
Howard Miller clocks feature customizable chime and strike functions, enhancing their aesthetic and functional appeal. This section guides you through enabling, disabling, and adjusting these features seamlessly.
7.1 Enabling and Disabling Chimes
To enable or disable chimes on your Howard Miller clock, follow the instructions in the manual. Most models allow chime activation via a switch or button. For nighttime silence, enable the Nighttime Chime Silence Mode, which automatically mutes chimes during specific hours. Ensure the chime rods are properly installed and aligned. If chimes are not sounding, check volume settings and ensure the strike mechanism is functional. Refer to the manual for model-specific guidance to customize your chime preferences effectively.
7.2 Customizing Chime Settings
To customize chime settings on your Howard Miller clock, access the control panel or buttons typically located on the front or side. Use the menu to select from available chime tones like Westminster or Ave Maria. Adjust the volume using a dedicated dial or button to set a comfortable level. For synchronization, ensure chimes align with the correct time, especially after time changes. Some models offer features like automatic volume adjustment or silent periods. Refer to the manual for specific instructions to tailor chime preferences effectively without affecting overall clock operation.
7.3 Adjusting Strike Volume
To adjust the strike volume on your Howard Miller clock, locate the volume control mechanism, often found near the chime selector or on the side of the clock. Use the adjustment knob or button to increase or decrease the strike volume. Some models feature a damper system to soften the sound. Ensure the clock is level and stable before making adjustments. Press the chime test button to verify the volume level. For precise control, refer to the manual for specific instructions tailored to your clock model.
Special Features
Explore features like nighttime chime silence, automatic time adjustment, and volume control, designed to enhance functionality and personalization of your Howard Miller clock experience.
8.1 Nighttime Chime Silence Mode
The Nighttime Chime Silence Mode allows you to disable chimes during specific hours, typically between 10 PM and 7 AM, ensuring uninterrupted rest. This feature is easily activated via a switch or setting, as detailed in your manual. It provides a peaceful environment while maintaining the clock’s timekeeping accuracy. Users can customize the silence period to suit their preferences, enhancing the clock’s functionality and convenience. This feature is particularly useful for maintaining a quiet home atmosphere during nighttime hours.
Refer to your specific model’s manual for activation steps, as procedures may vary. This mode is designed to complement your lifestyle while preserving the clock’s aesthetic and operational appeal.
8.2 Automatic Time Adjustment
Your Howard Miller clock may feature an automatic time adjustment option, ensuring accuracy without manual intervention. This feature, often found in quartz movement models, synchronizes the time based on a reliable internal mechanism. It eliminates the need for frequent manual adjustments, maintaining precise timekeeping. Some models may also automatically update for daylight saving time changes. This convenient feature enhances the clock’s functionality, providing hassle-free operation and ensuring your timepiece remains accurate and dependable over time.
8.3 Volume Control Options
Howard Miller clocks often feature volume control options to customize the chime and strike sounds. Many models allow you to adjust the volume using a dial or control located on the clock movement. This feature ensures that the chimes are pleasant and suitable for any room setting. Some clocks also include a mute option for complete silence. Proper adjustment ensures optimal sound quality, while maintaining the clock’s aesthetic appeal. Always refer to your specific model’s manual for detailed volume control instructions to achieve the desired sound levels effortlessly.
Maintenance and Care
Regular cleaning and proper handling ensure the longevity of your Howard Miller clock. Dust surfaces gently, avoid harsh chemicals, and store the clock in a dry, stable environment to preserve its craftsmanship and functionality.
9.1 Cleaning the Clock Exterior
For maintaining the beauty of your Howard Miller clock, gently clean the exterior using a soft, dry cloth. Avoid harsh chemicals or abrasive materials that could damage the finish. For stubborn stains, lightly dampen the cloth with distilled water, but ensure it is thoroughly wrung out to prevent moisture damage. Regular cleaning prevents dust buildup and preserves the clock’s finish. Always clean in a well-ventilated area, avoiding direct sunlight or extreme temperatures. This routine maintenance ensures your clock remains a stunning centerpiece for years to come.
9.2 Lubricating Mechanical Parts
Lubricating the mechanical components of your Howard Miller clock is essential for smooth operation. Use a high-quality clock oil or silicone-based lubricant, applying a few drops to pivot points and gears. Avoid over-lubrication, as excess oil can attract dust and degrade performance. Lubricate every 2-3 years or as needed, depending on usage. For intricate mechanisms, consult a professional horologist to ensure proper application. Regular lubrication prevents friction and wear, ensuring accurate timekeeping and extending the clock’s lifespan.
9.3 Storing the Clock Properly
When storing your Howard Miller clock, ensure it is clean and dry to prevent dust buildup and moisture damage. Place the clock in its original packaging or a sturdy box with padding to avoid scratches. Store in a cool, dry environment away from direct sunlight and extreme temperatures. Avoid exposing the clock to humidity or vibrations. Secure all components, such as pendulums and weights, to prevent movement. Store the clock upright if possible, and avoid stacking items on top of it. Proper storage preserves the clock’s condition for future use.
Troubleshooting Common Issues
This section helps identify and resolve common problems, such as time inaccuracy, chime malfunctions, or pendulum stopping. Consult the manual for solutions or contact support for assistance.
10.1 Time Inaccuracy Issues
Time inaccuracy can occur due to improper pendulum alignment or uneven clock positioning. Ensure the clock is level and the pendulum swings consistently. Check the weight positions and adjust as needed. If issues persist, consult the manual for synchronization instructions or contact customer support for further assistance.
10.2 Chime Malfunctions
If the chimes are not sounding correctly, check the chime mechanism for obstructions. Ensure the chime rods or tubes are securely attached and not bent. Verify the chime selector switch is set to the desired option. If issues persist, refer to the manual for reset instructions or adjust the strike volume. In some cases, synchronizing the pendulum may resolve the problem. If malfunctions continue, contact Howard Miller customer support for further assistance or potential repair options.
10.3 Pendulum Stopping
If the pendulum stops moving, ensure the clock is level and stable. Check for obstructions or misalignment in the pendulum swing. Verify that weights are properly hung and not touching the floor. Gently lift the pendulum to restart its motion. If it stops repeatedly, adjust the pendulum length or synchronize its swing with the clock’s rhythm. Consult the manual for specific adjustments or contact Howard Miller customer support for professional assistance if the issue persists.
Warranty and Service Information
Howard Miller clocks are backed by a comprehensive warranty. Visit our official website for detailed service information and contact customer support for professional assistance and repairs.
11.1 Understanding the Warranty
Howard Miller clocks are protected by a limited warranty that covers defects in materials and workmanship. The warranty period varies by product, typically ranging from two to five years. It ensures repair or replacement of defective components, excluding normal wear and tear. For detailed terms, visit the official Howard Miller website or refer to the provided documentation. Understanding your warranty helps maximize protection and ensures long-term satisfaction with your timepiece.
11.2 Contacting Customer Service
For inquiries or assistance with your Howard Miller clock, contact customer service through their official website or call the provided support number. Email and live chat options are also available for convenience. Visit www.howardmiller.com to access contact details and support resources. Representatives are available to address questions, provide troubleshooting guidance, and assist with warranty claims. Ensure to have your product model number ready for efficient service. Howard Miller is committed to delivering exceptional support to enhance your ownership experience.
11.4 Scheduling Professional Repair
To schedule a professional repair for your Howard Miller clock, visit the official website or contact customer service directly. Provide your clock’s model number and a detailed description of the issue. A certified technician will be assigned to address the problem. Ensure the clock is properly packed for transportation if an on-site repair is not available. Avoid attempting self-repairs, as this may void the warranty; Professional repair ensures your clock retains its quality and functionality. For more information, refer to the support section on www.howardmiller.com.

Additional Resources
Access online manuals, video tutorials, and FAQs for comprehensive guidance. Visit www.howardmiller.com for detailed resources to enhance your clock ownership experience;
12.1 Accessing Online Manuals
To access online manuals for Howard Miller clocks, visit the official website at www.howardmiller.com. Here, you can download PDF versions of instruction manuals for various models, including grandfather clocks, wall clocks, and mantel clocks. Simply search for your specific clock model, such as the 615-069 or 625-205, and follow the download instructions. These manuals provide detailed setup, operation, and troubleshooting guides to ensure your clock functions perfectly. Referencing these resources is an excellent way to resolve common issues and optimize your clock’s performance.
12.2 Video Tutorials and Guides
Howard Miller offers video tutorials and guides to assist with clock setup, operation, and maintenance. These videos are available on the official website and cover topics such as hanging chime tubes, synchronizing pendulums, and troubleshooting common issues. They provide step-by-step instructions for models like the 615-069 and 625-205, ensuring clarity and ease of understanding. Whether you’re assembling a new clock or resolving a technical issue, these resources are invaluable for both novice and experienced users. Visit www.howardmiller.com to explore the video library.
12.3 Frequently Asked Questions
Howard Miller clocks often prompt questions about setup, maintenance, and troubleshooting. Common inquiries include how to synchronize pendulums, address time inaccuracy, and resolve chime malfunctions. Users also ask about proper care techniques and warranty details. These FAQs provide concise solutions and guidance, ensuring optimal performance and longevity. For specific models like the 615-069 or 625-205, additional resources are available online. Visit www.howardmiller.com for detailed support and troubleshooting tips tailored to your clock model.
13.1 Final Tips for Clock Maintenance
Regularly clean the clock exterior with a soft cloth and avoid harsh chemicals. Lubricate mechanical parts as needed to ensure smooth operation. Store the clock in a cool, dry place when not in use. Check pendulum alignment periodically for accuracy. Refer to the manual for specific care instructions tailored to your clock model. Schedule professional servicing every 5-7 years to maintain precision. By following these tips, your Howard Miller clock will remain a timeless and functional piece in your home for years to come.
13.2 Enjoying Your Howard Miller Clock
Your Howard Miller clock is a timeless piece that combines elegance and functionality. With proper care, it will provide years of reliable service and aesthetic beauty. Enjoy the soothing chimes, precise timekeeping, and the rhythmic swing of the pendulum. Take pride in its craftsmanship and the way it enhances your home decor. Whether it’s a grandfather clock or a wall clock, it will become a cherished part of your daily life and a lasting family heirloom.